

The 12 Step Guide to Starting a Community Garden
Exploring and interacting with a community garden can be an exciting way to grow your own food, learn gardening tips from others, and help the environment. But what if your community doesn’t have a community garden? Here are 12 easy steps to start your own!
Step 1: Get neighbors involved!
Starting a community garden alone is a daunting task... so get the community involved! A Facebook page dedicated to starting the garden is a great way to get your neighbors involved. If you’re not a Facebook user, you can try similar collaboration methods with Instagram groups, Google hangouts, or even a good ol’ fashioned door to door campaign. Having at least 10 different community members is ideal in order to get the garden project off the ground.
Step 2: Form a garden club
Now that you have your team of neighbors, you’ll need to form a “club” to develop a plan and divide the work efficiently. Having monthly meetings where everyone is involved is a great way to make sure everyone will be invested in this garden all the way throughout the design, location, and keeping up with the maintenance.
Step 3: Find the Location for the Garden
The next step is to locate a flat vacant lot somewhere in your community with a plethora of sun (at least six to eight hours each day). It should be within walking distance or a short drive for the members of your club for it to be an optimal location.
It is also imperative to select a few different locations that could work for your community. When finding these locations be sure to record the exact address and cross streets.
Step 4: Find out Who Owns the Land
It is illegal to use land without the owner's permission. The first step in getting permission is to find out who owns the land.
To do this, you’re going to want to talk with the county’s tax assessor’s office. Here you’ll be able to find information regarding who currently owns the land, and hopefully some contact information.
Step 5: Find out if Your Proposed Site has Water
While you're searching for the person that owns the site, contact the water service provider to find out if your potential site(s) have an existing water meter to hook in to. When calling your water service providers, request a “site investigation.” They’ll need the information you took to the Tax Assessor’s office.
Having access to water will make a critical difference in the expense of getting your garden up and running. If there has been water service to the site in the past, it’s fairly inexpensive to get a new water meter installed (if one is not already there). However, it might be a little pricier to install a lateral line from the street main to the site and install a new meter if no water service was in the location to begin with.
Step 6: Contact the Owner
Once you determine if your location is realistic and feasible, write a letter to the landowner asking permission to use the property for a community garden. Make sure you make it clear to the landowner the value it will bring to the community and that the gardeners will be responsible for maintaining the garden and keeping it clean. This will relieve the sense of responsibility from maintaining the site or paying city weed abatement fees.
You should attempt to negotiate for 3 years if possible. Many landowners will be worried about any liabilities for injuries that may occur on their land. To prevent this issue, you can include a waiver for every person to sign when they start gardening at the community garden.
Step 7: Planning the Garden
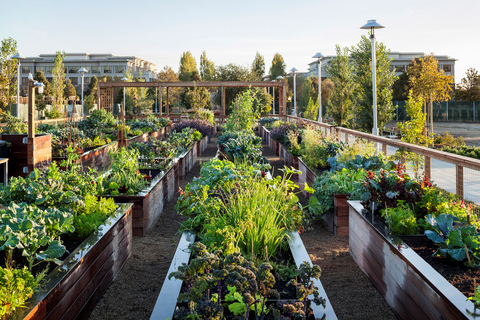
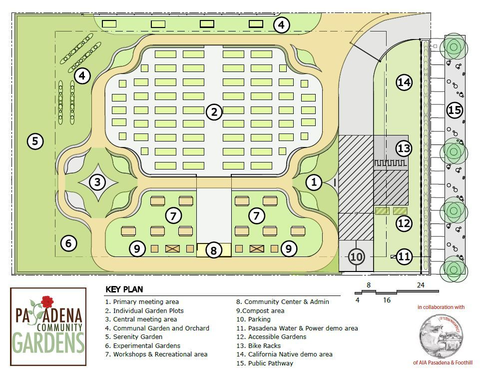
Community members should be involved in the planning, designing, and setting up of the garden. Hold two or three garden club meetings to develop a design and a plan. Using visuals like drawings and photos with different garden components such as flower beds, compost bins, and raised garden beds are helpful to make group decisions on how the garden should look.
Step 8: Creating a Garden Budget
Once you establish a plan for your garden, then the next step is to create the budget to put this plan in action. Call around and get prices for fencing and other items. The basic elements of a community garden typically cost around $2,500 to $5,000.
Step 9: Where to Get Materials and Money
While some startup funds will be needed, through hard work and determination it will be possible to receive supply donations. Loca
Step 10: Make Sure Your Garden Infrastructure is in Place
Now you’re ready to establish garden rules with your garden club. Meet with your club members, then implement and divide tasks evenly to determine what is left to be done. This is also the time when you should consult with your city and team up with them for trash pick-up and partake in other events throughout the community. Their staff can also help with community organizing and soliciting material donations.
Step 11: Get Growing!
It's time to apply the finishing touches!
-
Clean up your site
-
Install the Irrigation System
-
Get planting!
Step 12: Celebrate!
Congratulations! All of your efforts and hard work have sprung into action! Now your neighbors and supporters can utilize their very own community garden to grow their own plants!